How to Change a Tire: A Step-by-Step Guide for Every Driver
Nobody plans for a flat tire. Yet it happens to millions of drivers every year. Knowing how to change a tire is a fundamental skill that keeps you safe and independent on the road. This pillar page will guide you through every phase of tire changing, from essential tools to final safety checks, so you can handle this roadside challenge with absolute confidence.
Why Mastering Tire Changing Matters
Learning how to change a tire saves time and money while building driving confidence. Roadside assistance can take hours to arrive, but a DIY fix takes less than 30 minutes. You avoid towing fees and delays. More importantly, mastering this skill keeps you prepared for unpredictable road conditions. Studies show that over 70% of drivers don’t know how to change a tire. Don’t be part of that statistic. This knowledge is not just convenient, it is a key aspect of responsible car ownership.
What You Need to Change a Tire
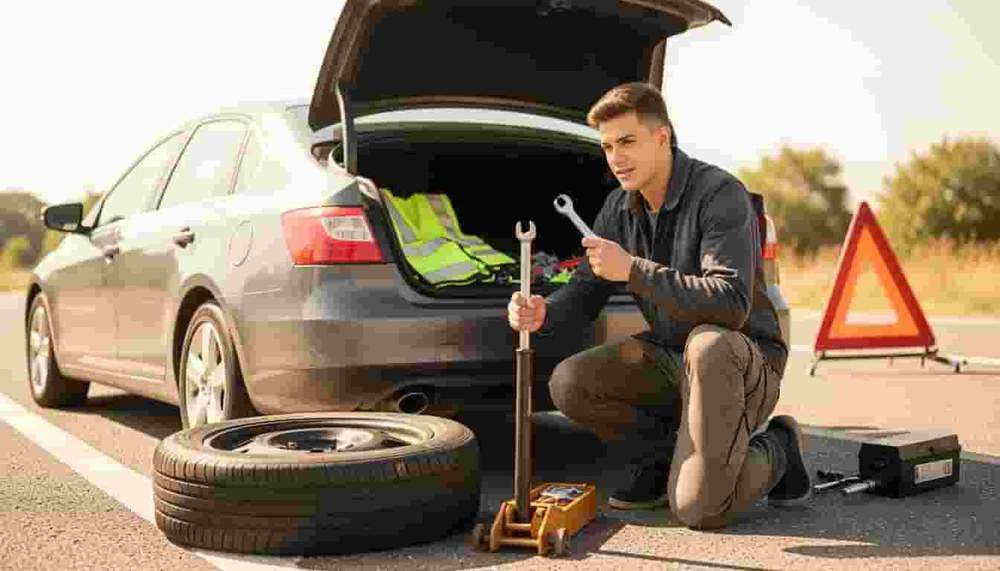
Before you ever need to perform a tire change, ensure your vehicle is properly equipped. A standard vehicle typically includes the necessary equipment stored in the trunk or cargo area .
- Spare Tire: This can be a full-size spare or a smaller “donut” temporary tire. Check its air pressure monthly.
- Car Jack: Used to lift the vehicle off the ground. A scissor or bottle jack is common.
- Lug Wrench: This tool loosens and tightens the lug nuts on your wheel.
- Vehicle Owner’s Manual: Contains vital information about jack points and specific instructions for your car model.
- Wheel Wedges: Placed against the wheels to prevent the car from rolling.
Some drivers keep a flashlight, work gloves, and a portable tire inflator in their car for added safety and convenience .
Step-by-Step Tire Changing Process
Mastering how to change a tire requires following these steps in the correct order. Each step builds on the last to ensure a safe and effective tire change.
Step 1: Find a Safe Location
As soon as you realize you have a flat tire, reduce your speed gradually. Do not slam on the brakes. Pull over to a flat, stable area away from traffic. A parking lot or a wide shoulder is ideal . Once stopped, engage the parking brake and turn on your hazard lights to alert other drivers. Place wheel wedges against the tires opposite the flat tire to prevent rolling .
Step 2: Gather Your Tools and Spare Tire
Retrieve your spare tire, jack, and lug wrench from the storage compartment. If you have a hubcap covering the lug nuts, use the flat end of your lug wrench to carefully pry it off . Place your tools within easy reach of the flat tire.
Step 3: Loosen the Lug Nuts Before Lifting
This is a crucial safety step. With the vehicle still on the ground, use your lug wrench to turn the lug nuts counterclockwise. Loosen them just enough so they can be unscrewed by hand later. Do not remove them completely yet. Keeping the wheel on the ground prevents it from spinning while you apply force to the lug nuts .
Step 4: Position the Jack and Lift the Vehicle
Consult your owner’s manual to find the correct jack point for your vehicle. This is a reinforced section of the frame specifically designed to support the car’s weight . Place the jack firmly under this point. Slowly turn the jack handle clockwise to raise the vehicle until the flat tire is about six inches off the ground. Never place any part of your body under a vehicle supported only by a jack .
Step 5: Remove the Lug Nuts and Flat Tire
Now that the wheel is off the ground, completely unscrew the loosened lug nuts by hand. Place them in a safe location, such as a hubcap or a pocket, so they do not roll away. Grip the flat tire with both hands and pull it toward you to remove it from the wheel hub. If the tire is stuck, gently kick the top or bottom of the tire to break it free .
Step 6: Install the Spare Tire and Hand-Tighten Lug Nuts
Lift your spare tire and align the holes with the wheel studs on the hub. Push it firmly into place. Thread the lug nuts back onto the studs by hand, tightening them as much as possible. Finger-tightening the nuts prevents cross-threading, which can damage the wheel assembly .
Step 7: Lower the Vehicle and Torque Lug Nuts
Turn the jack handle counterclockwise to slowly lower the vehicle. Stop when the spare tire is just touching the ground, but the full weight is not yet on it. Using the lug wrench, tighten the lug nuts in a star or crisscross pattern. This ensures the wheel seats evenly . Fully lower the vehicle to the ground, then tighten the lug nuts again in the same star pattern.
Step 8: Final Steps
Replace the hubcap on the spare tire if it fits. Store the flat tire, jack, and tools back in your vehicle. Double-check the tightness of the lug nuts one final time.
Understanding Spare Tire Limitations
Knowing how to change a tire also means knowing the limits of your spare. Most temporary spare tires, often called “donuts,” are not designed for long-distance or high-speed driving .
- Speed Limit: Do not exceed 50 mph.
- Distance: Replace the spare with a full-size tire within 50-70 miles.
- Vehicle Handling: Spare tires are smaller and lighter, which can affect handling. Drive cautiously.
Frequently Asked Questions About Changing Tires
1. Is it safe to change a tire on the side of a highway?
Only if it’s an absolute emergency. Pull as far from traffic as possible. Find flat, solid ground. If conditions are unsafe, call roadside assistance instead.
2. What should I do if my car doesn’t have a spare tire?
Many newer vehicles come with a tire repair kit or run-flat tires instead. Run-flat tires allow you to drive a limited distance to a repair shop. Otherwise, roadside assistance is your safest option .
3. How do I know if my spare tire is in good condition?
Make checking your spare tire’s air pressure part of your monthly car maintenance routine. Also, regularly inspect it for cracks, bulges, or dry rot .
4. When should I call for help instead of changing the tire myself?
If you are on a busy highway, if the weather is severe, or if you feel uncomfortable with any step, call for help. Your personal safety is the priority.
5. Where can I get a tire repaired or replaced?
Any qualified tire shop or auto repair shop can inspect your damaged tire and perform a permanent repair or replacement.
6. What is the correct way to tighten lug nuts?
Always tighten lug nuts in a crisscross or star pattern. This distributes the pressure evenly and ensures the wheel is properly seated .
Conclusion
Mastering how to change a tire transforms a stressful roadside emergency into a manageable 30-minute task. The skill ensures your independence and safety on the road. Remember to prioritize safety, use the correct tools, and understand your spare tire’s limits. Take 15 minutes this weekend to locate the tools in your car and practice a tire change at home. This small investment will make you a more confident and prepared driver.